
Local Setup Using Virtual Host (Apache)
Step 1: Setup Virtual Host (Required)
First, configure the Apache virtual host:

Restart Apache after saving the file.
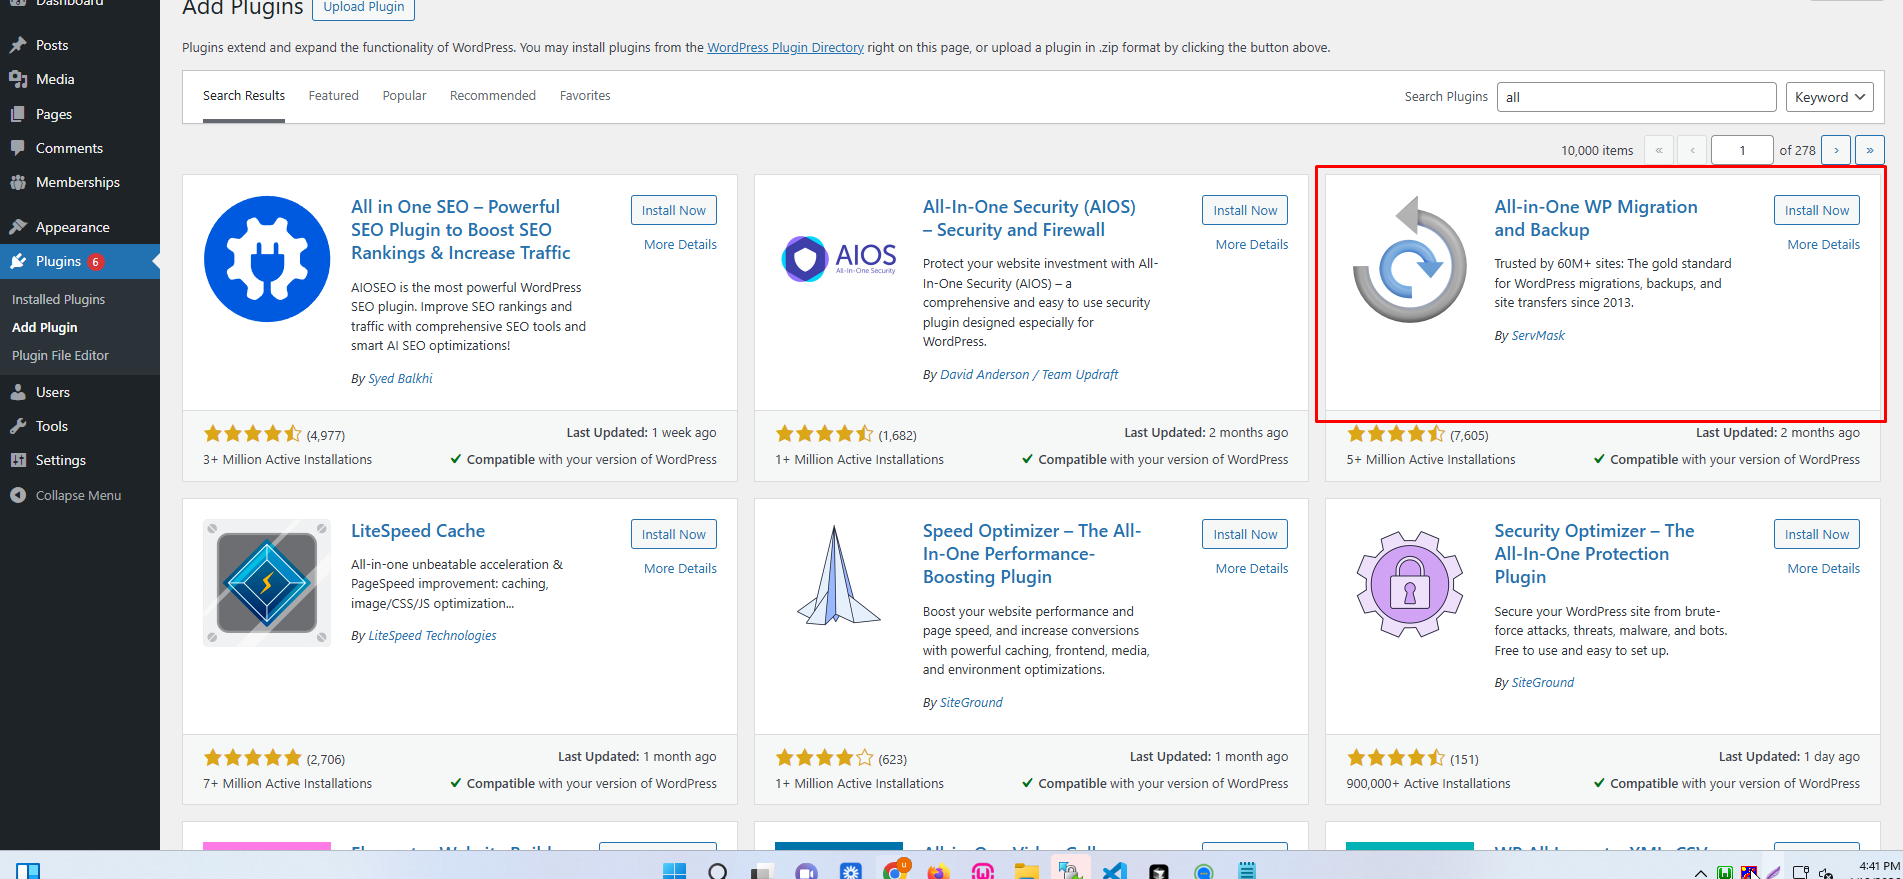
All-in-One WP Migration is the gold standard for WordPress site migration, used by over 60 million websites worldwide – from small blogs to Fortune 500 companies and government agencies. Our plugin offers enterprise-grade reliability with beginner-friendly simplicity.
Method to Install Plugin
-
Login to WordPress Admin
-
Go to Plugins → Add New
-
Search All-in-One WP Migration
-
Click Install Now → Activate
Method 2 – Upload Plugin (ZIP)
-
Download plugin from wordpress.org
-
Go to Plugins → Add New → Upload Plugin
-
Choose ZIP file → Install Now → Activate
Method 3 – Via FTP
- Upload plugin folder to:/wp-content/plugins/
- Go to Plugins in WordPress → Activate
Import Site Backup (All-in-One WP Migration)
1. Open Import Page
-
Go to WordPress Dashboard → All-in-One WP Migration → Import
2. (Recommended) Open Browser Console Before Import
Opening the console helps you see upload errors in real time.
-
Chrome / Edge / Brave:
PressF12orCtrl + Shift + I→ open Console tab -
Firefox:
PressCtrl + Shift + K
📌 Keep the console open during the upload
3. Upload the Backup File
-
Click Import From → File
-
Select your
.wpressbackup file
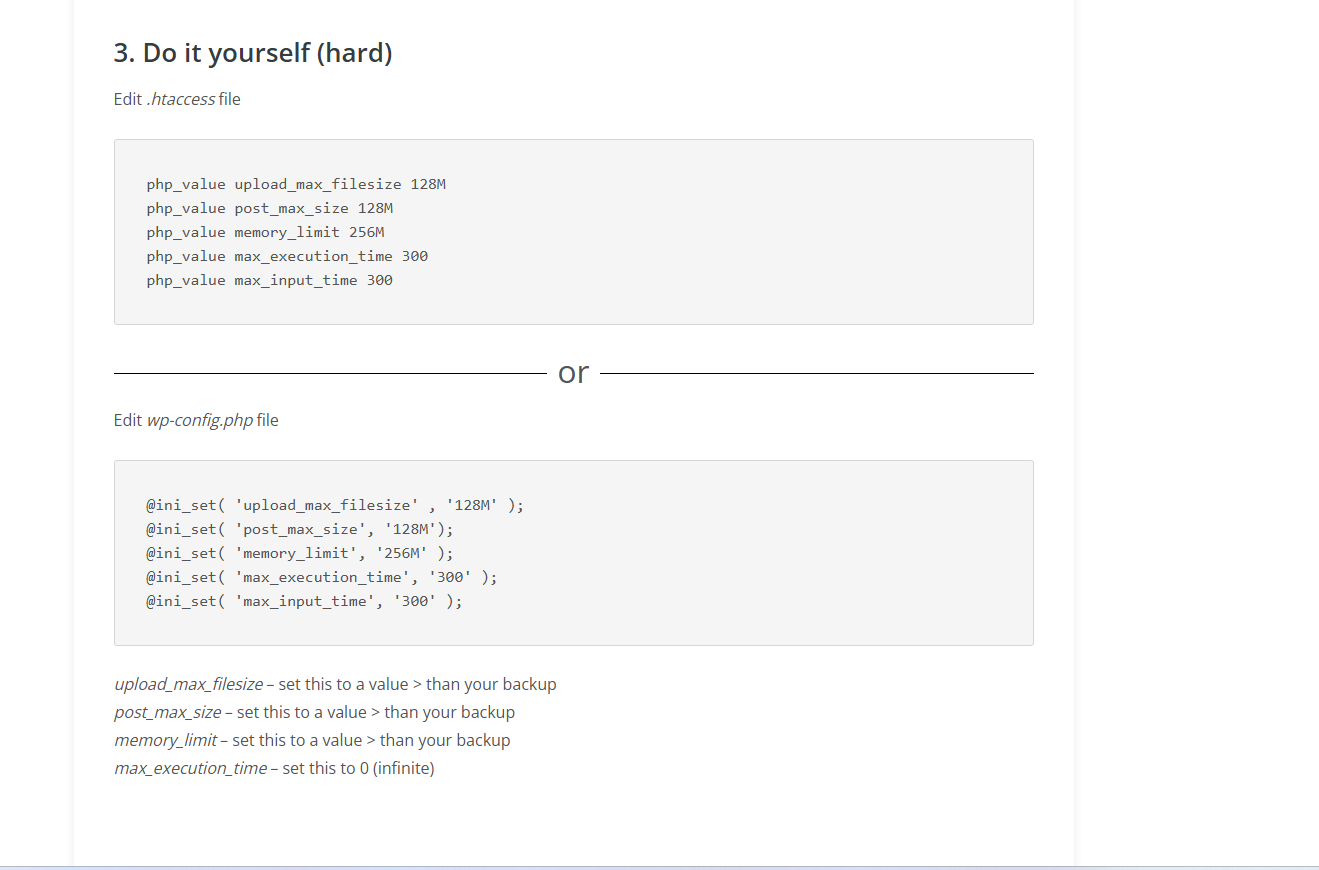
If the file is larger than the allowed limit, click “Raising your upload limit” and add the following to your
.htaccessfile:Save the file
Refresh the Import page
Try importing again
5. Fix “Request Entity Too Large” (413 Error)
If you see Request Entity Too Large in the browser console or upload fails instantly:
A. Edit Apache Configuration
Open your Apache config file:
(or sometimes
apache2.confor000-default.conf)B. Add / Update This Line:
📌 This allows very large uploads.
C. Restart Apache
6. Try Import Again
-
Reload All-in-One WP Migration → Import
-
Upload the
.wpressfile again -
Monitor the browser console for errors
-
Deactivate and delete all SMTP / mail plugins to avoid local email errors.
Step 3: Add Rules at Top of .htaccess
Add the following at the top of .htaccess:
Step 4: Verify URLs & Database Access
-
Check
wp-config.phpfor correct:-
Database name
-
Username
-
Password
-
-
Check
wp_optionstable:-
siteurl -
home -
Ensure both use the correct local URL
-
Step 5: Update Admin Email (Database)
-
Update admin email directly in the
wp_optionstable if required.
Step 6: Reset Admin Password
-
Change admin user password directly from the
wp_userstable. -
Login to WordPress Admin.
Step 7: Save Permalinks
-
Go to Settings → Permalinks
-
Click Save Changes
Step 8: Elementor Fix (If Elementor Site)
-
Go to Elementor → Tools
-
Click Sync Library
-
Click Regenerate Files & Data
Step 9: Save Permalinks Again
-
Go to Settings → Permalinks
-
Click Save Changes again
Step 10: Remove Cache Plugins (Optional)
-
Deactivate and delete cache plugins (not mandatory for local).